Thursday 20 June 2013

New Homemade Axe Handle

Ever since I got my axe from olive mead forge it has been a joy to use. The weight of the head allows me to strip off wood like a hot knife through butter and the double bevel lets me carve concave's much easier than my single bevel gransfors. Even the beard of the axe looks stunning when in use, but the only issue I had with the axe was the handle. When it was supplied the handle was a tad too long though this was so I could cut the handle to the length I wanted. When this was done I found the handle was too slim for my hands which meant I had to grip harder, and having gotten used to that I felt that all was well. But over time I have been wanting to get a new handle to make it mor comfortable and personal for myself.

And this is the result.


I nice piece of ash carved with axe and knife to the shape and size I like. I chose a straight handle as that is more befitting of a medieval axe. Very few illustrations if any show curved handles for axes (shown below). But also because I felt the straight design would contrast nicely with the curved blade. the blade is kinking slightly to the left but that is fine for a left hander like myself.

(15th century italy)
(15th century Germany)
(15th century Belgium)

The wedge is a piece of birch I had lying around from some spoon blanks. I tend to use what I have at hand rather than travel to the ends of the earth for a small oak wedge. Use what you have local before your start looking further afield.


Now to give it a couple coats of linseed and beeswax.


Wednesday 24 April 2013

Nice Weather for Some Work

now the weather has finally taken a turn for the better over here I have decided to do more woodwork. Have more light in the mornings and evening has thins a much more pleasurable experience as trying to carve in the dark is almost impossible (not to mention dangerous). So I have been going through some birch that I acquired from a nature park near my dads which is a lovely material to carve, its soft nature when green makes it easy work with an axe and knife but as it seasons it becomes lovely and hard to take a nice polished finish from the tool.


I was also able to get some cherry to make some bowls and got a few off cuts to make some spoons. All turned out quite well.


Having made so many spoons lately I can't wait to be apart of spoonfest this coming August. I was unable to to attend last year but will be good to share skills, thoughts, and methods.

Monday 25 March 2013

Cooking and eating

Since getting my pole lathe working I have been making some wooden bowls for my kitchen. As much as I do like my porcelain bowls, being that I can stick them in the microwave and cook stuff instantly, I find it detracts from the joy off eating from my own homemade wooden bowls. My breakfast bowl is nice to eat from as it has aged nicely and everyday I use it, it brings back memories of making it and the journey it has taken. So having made some wooden bowls I wanted to make some pieces to cook with.

To that end I have made a nice little trough and serving spoon out of some rippled willow. Was an absolute bugger to carve due to the rippling wanting to break off and do its own thing. But they came out rather nice after a little perseverance and oiling. The trough will be a wonderful addition to serve food or to make dough in for bread as it follows the traditional pattern which is somehow find very pleasing. Whether it is its symmetry or its functionality I don't know but it just seems so nice.


Now too test them out and see how they age after use.


Monday 4 March 2013

First Bowls On Lathe And Some Sheaths

after finishing the lathe last week I decided to test out a couple bowls on it. had to grab my tools from my workshop in Hull, and axe out some bowl blanks of sycamore.this was taken from the nursery just down the road from me and the guy there is wonderful and lets take a few bits every now and then.


I flattened the top using the axe then marked the circle and sawed the corners off. Used the axe to then carve the round bowl shape from the bottom upwards.


Then the mandrel


turning the outside first and then the inside


nice thinned core. this shot shows how fine the shavings are on the bowl. not the fast turned clean marks that medieval turners made but still very good.


having used the lathe for the first time its work perfectly well and has enough weight to handle turning bowls but not too heavy not to transport. Really want to show the lathe to sherwood forest who gave me the oak to make the bed and legs. I may have to turn them something nice in return to thank them.
But also having thought about re-enacment this year i felt it time to make some tool sheathes so i can stop hiding away tools from the public. I have to say over the past couple of years doing woodworking displays in front of public, they can easily spot out modern items very well. the amount of times people have noticed the "Made in sweden" mark on my gransfors axe has annoyed me so much. so for authentic tools they need authentic sheaths.


The axe, adze, and gouge simply have folded leather cover that was shaped to follow the form of the blades. Whereas the knife require a little more precision by mark the sheath fit it perfectly. After looking through archaeology books with surviving sheaths i decided to follow this article for a scandi sheath as the result were virtually the same as the originals (though the suspension strap isn't).


Sunday 24 February 2013

Making a New Pole Lathe Part 3

Have spent the past couple weeks finishing off the lathe so will try and make this the last post in regards to the construction.

Step One: Prepare the Metal Centres

once the material is found, grind the centres.


I like to have one center bent so I fired up the forge to bend the center


Step Two: Placing centres in poppets

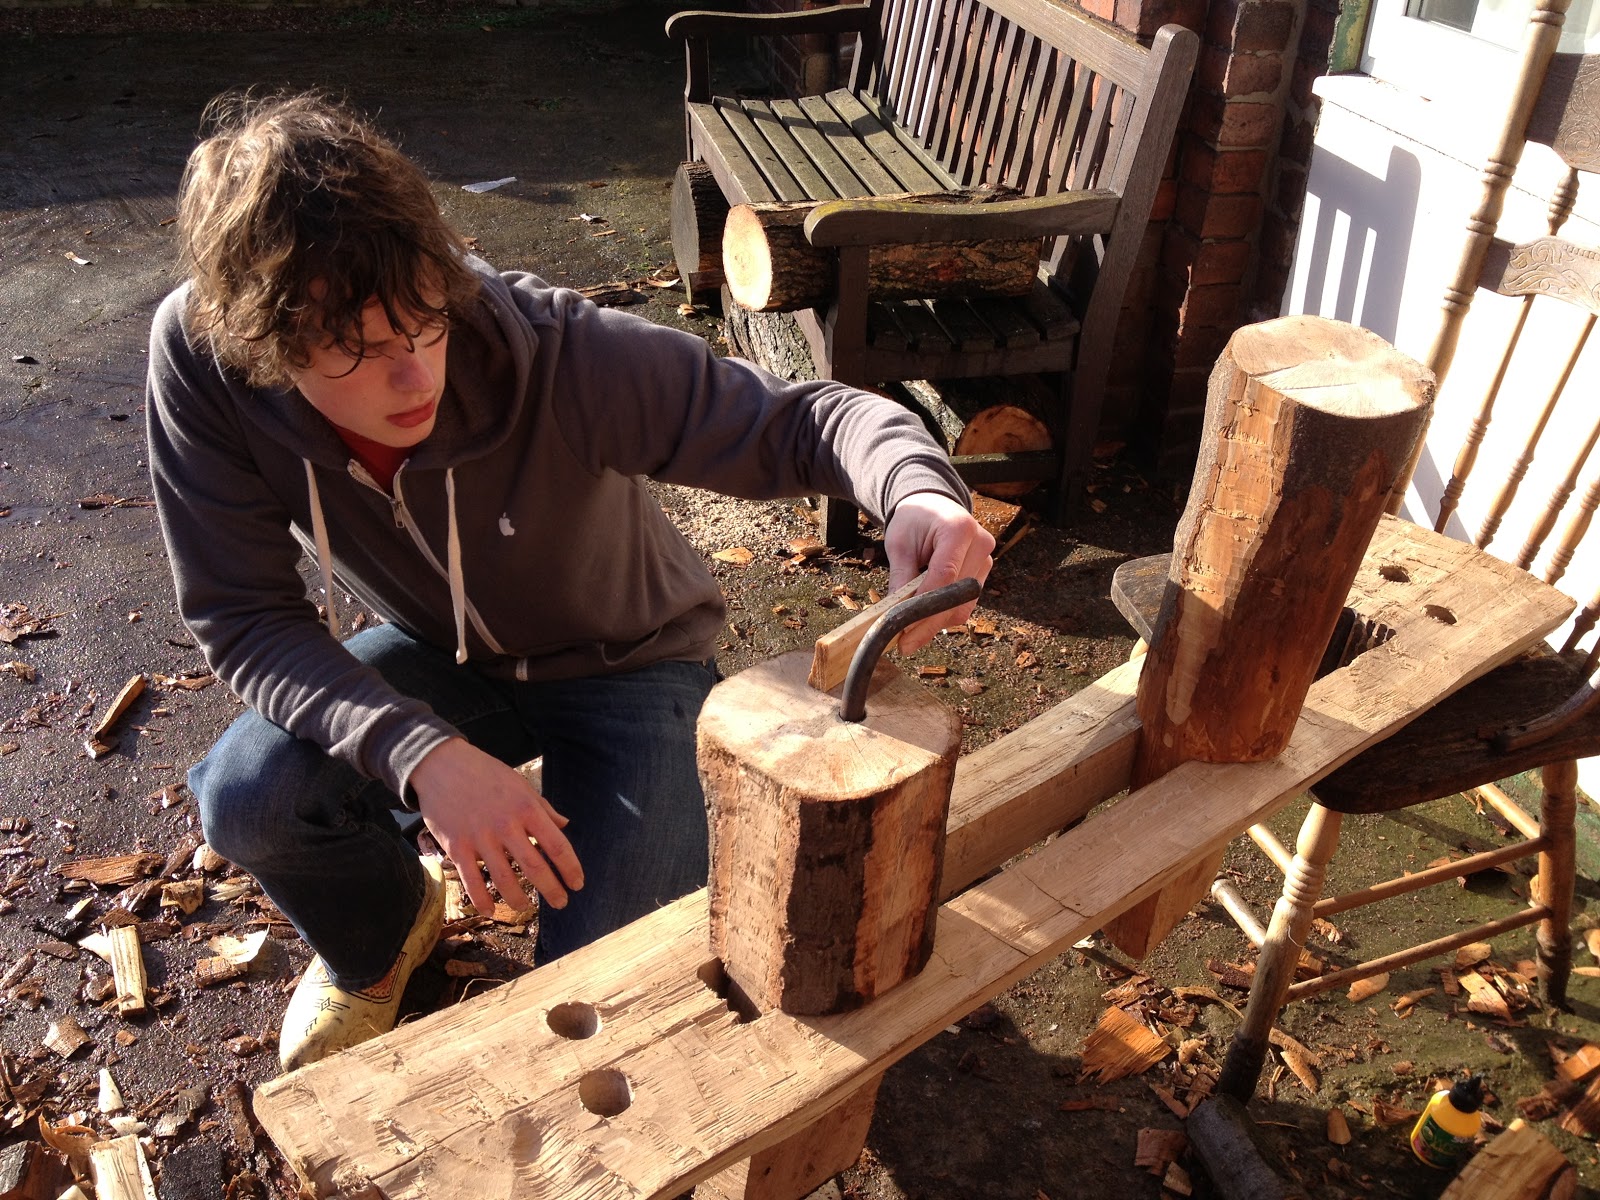
Drill hole into poppets.


once the hole has been drilled take a mallet and strike the center until it sits perfect. Then simply check how the center looks and line it up with the other taller poppet and mark where the other need centre needs to be.


Step Three: Tool Rest Assembly

To start take the actual tool rest and mark a line where it sits level


This marks out where the support for the tool rest needs to sit (just below the line). so drill the hole there.


split a piece of wood and hammer into the hole. then place the tool rest on top.


Note: this tool rest alignment is for a left handed turner. for right handed reverse alignment.


Step Four: Treadle, Pole, and Done!!!
The lasts step for the lathe are to source a decent sized pole, some wood for an A-frame, and the treadle. When you have sourced all of this the last thing to do is tweak it all until you are happy with it and test the lathe out. I tested out a piece of sycamore to see how the lathe performed and I am pleased with the results.

If anyone has got any questions or feedback about this project please leave a comment on this blog.


Wednesday 6 February 2013

Making a New Pole Lathe Part 2

Have finally had chance to do a write up of building my new pole lathe. After Christmas and the recent weather I have been tinkering with my oak bed to make it fit for purpose.

Step 1 fitting the legs to the bed


Axe the legs to fit the holes in the bed. The legs didn't sit flush initially but I just trimmed them until they were fairly level and just above my hips.


Once level, test the bed to make sure it handle any extra weight. I tested it by sitting on bed to support my whole body weight. This is done because the lathe will take many forces when uneven bowl blanks spin.


Step 2 Mark up the legs


These markings make it easier to line up the legs to get the same fit and height. Numbering the legs to the holes also works very well.


Step 3 Create the poppets


Select a suitable piece of wood. preferably straight grained.


Saw the piece to length. Remember to leave a little extra length just incase.

"you can take more off, but you can't put it back on"


Next mark up and cut the tenon to fit through the slot.
And repeat to create the second poppet


Next couple of stages will be sourcing the metal centres for the poppets though these may require an entire post focused on them alone. Then the tool rest set up will follow afterwards.

Hopefully my next posts will become more regular showing more update as I go.

Again any questions please feel free to ask.