Sunday, 24 February 2013

Making a New Pole Lathe Part 3

Have spent the past couple weeks finishing off the lathe so will try and make this the last post in regards to the construction.

Step One: Prepare the Metal Centres

once the material is found, grind the centres.


I like to have one center bent so I fired up the forge to bend the center


Step Two: Placing centres in poppets

Drill hole into poppets.


once the hole has been drilled take a mallet and strike the center until it sits perfect. Then simply check how the center looks and line it up with the other taller poppet and mark where the other need centre needs to be.
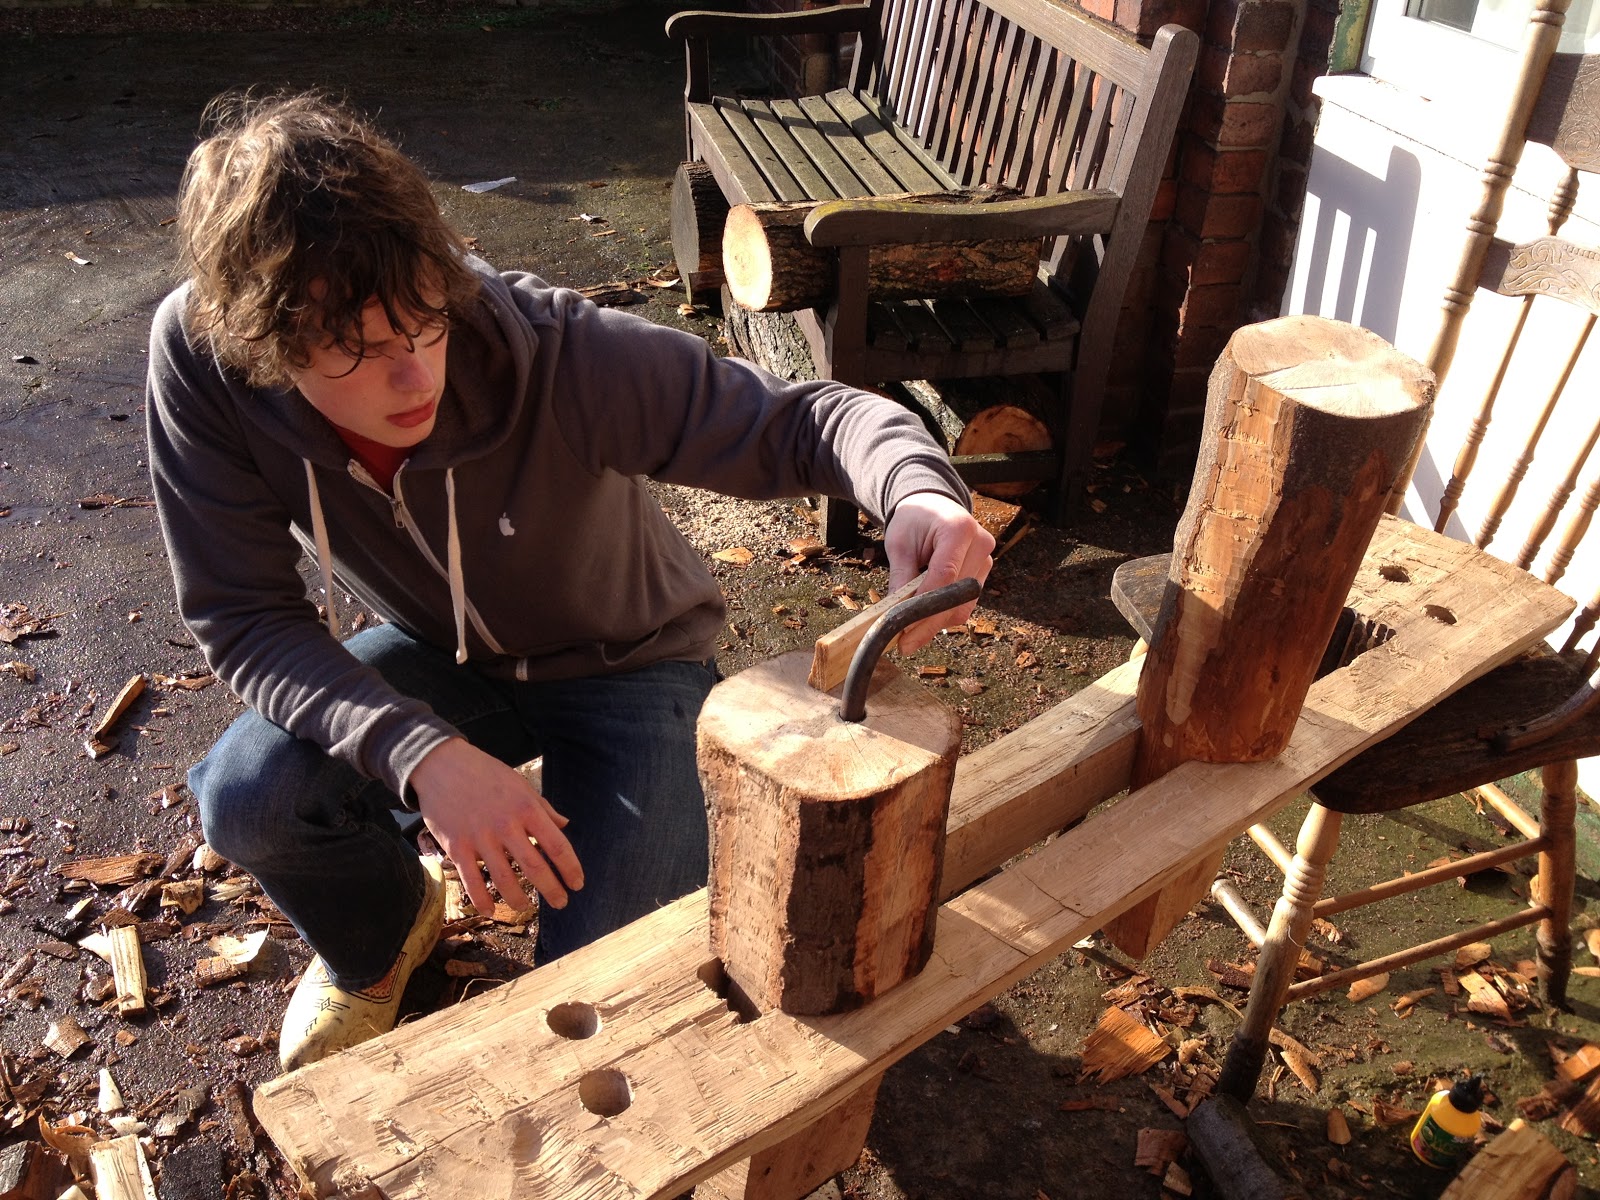


Step Three: Tool Rest Assembly

To start take the actual tool rest and mark a line where it sits level


This marks out where the support for the tool rest needs to sit (just below the line). so drill the hole there.


split a piece of wood and hammer into the hole. then place the tool rest on top.


Note: this tool rest alignment is for a left handed turner. for right handed reverse alignment.


Step Four: Treadle, Pole, and Done!!!
The lasts step for the lathe are to source a decent sized pole, some wood for an A-frame, and the treadle. When you have sourced all of this the last thing to do is tweak it all until you are happy with it and test the lathe out. I tested out a piece of sycamore to see how the lathe performed and I am pleased with the results.

If anyone has got any questions or feedback about this project please leave a comment on this blog.


Wednesday, 6 February 2013

Making a New Pole Lathe Part 2

Have finally had chance to do a write up of building my new pole lathe. After Christmas and the recent weather I have been tinkering with my oak bed to make it fit for purpose.

Step 1 fitting the legs to the bed


Axe the legs to fit the holes in the bed. The legs didn't sit flush initially but I just trimmed them until they were fairly level and just above my hips.


Once level, test the bed to make sure it handle any extra weight. I tested it by sitting on bed to support my whole body weight. This is done because the lathe will take many forces when uneven bowl blanks spin.


Step 2 Mark up the legs


These markings make it easier to line up the legs to get the same fit and height. Numbering the legs to the holes also works very well.


Step 3 Create the poppets


Select a suitable piece of wood. preferably straight grained.


Saw the piece to length. Remember to leave a little extra length just incase.

"you can take more off, but you can't put it back on"


Next mark up and cut the tenon to fit through the slot.
And repeat to create the second poppet


Next couple of stages will be sourcing the metal centres for the poppets though these may require an entire post focused on them alone. Then the tool rest set up will follow afterwards.

Hopefully my next posts will become more regular showing more update as I go.

Again any questions please feel free to ask.

Monday, 1 October 2012

Sherwood Forest Turnings

I have spent the past two days re-enacting in sherwood forest. I have to say its been a fantastic event! have had ago at firing a replica 15th century canon, having a few fights throughout the day, and making some pole lathed bowls for some re-enacters. I was able to make 4 bowls over the 2 days, i would have had 5 but one sadly split whilst trying to snap the core off.


the top two were made out of sycamore which was rather dry but gave a superb finish and the bottom two are made out of some birch local to sherwood forest. The birch was very green a cut like a dream and was lucky enough to take a little bit of the birch home to make some more bowls (and maybe some spoons).

Monday, 24 September 2012

Some Carved Bowls And a New Tool

having done a bowl carving course a couple of months ago I have finally got the tools (and time) to have ago at carving some bowl and troughs. the first ones where done fort paull back in august where i was able to carve two bowls out of some willow. this was the first time i had chance to test out a hook tool i had made which worked well cutting across the grain of the wood but blunted cutting along the grain, and after sharpening 4 times i came to the conclusion that the tool had not been hardened enough. But the bowls turned out great!!! and i was able to give one of them to a friend who works at skidby mill.


I was able to re-harden the hook and get it too work later on, but not bad for a piece of car spring i got for free.


The start: two car springs 


unwinding in the forge


Left: forged blade
Right: grind put on the blade


heating up to curl the blade with a hammer

sadly i forgot to take photos after this point as its very fast work and i need full concentration to get it right. I have to say making ones own tools is a great experience and it gives a great feel for the craft at hand. still have another hook to make so when i get chance will have ago.


Thursday, 16 August 2012

Life of A Wooden Spoon

Bit of an odd post but felt it was appropriate after looking at some of my wood ware I made a while ago.

As people we all use utensils too cook and eat with. Many of these could made of stainless steel, wood, or plastic. Stainless steel tends to have nice polish on it and as the name states doesn't stain that much so a spoon made of that will look brand new in 10 years time. Plastic reacts the same but over time may just lose its shine a little.

Wood on the other hand I find tends to tell a story of its life. When I was cleaning a cooking and eating spoon today they looked very different since they were made. The eater is made out of maple 2 years ago and has since them dulled to a nice brown, also has been chipped on the handle. The cooking spoons bowl has turned yellow after making some carrot coriander soup and the back of the handle has some small burns from being left on the edge of the pan. They both tell a story of being used and age nicely giving both a distinct character (one that can't be reproduced). And they will continue to gain character for the rest of their working lives.

Also last week I sent a spoon to a friend in Colombia for her birthday. I wonder what that spoon will look like after a few years of use over there. One thing is true, that it will be a well travelled spoon.

Monday, 13 August 2012

Quick update

Only a quick post today. Spent Sunday doing some re-enactment with the Savilles Household at croft castle near wale and I was lucky enough to do some bowl turning on my pole lathe whilst I was there (thanks to gary ball for bringing some poles). Was a fantastic venue and a fun day out with lots of public who were very interested in the pole lathe and how bowls were made.

I was only able to produce two bowls out of sycamore as I had to keep stopping and starting throughout the day. But was great to see adults and children who were interested in medieval bowls and medieval history.


Can't wait to do more turning next year with the society and maybe a few more crafts such as spoon carving and bowl carving.